> ## Documentation Index
> Fetch the complete documentation index at: https://makeswift-sasha-eng-8460-create-a-guide-for-troubleshooting.mintlify.site/llms.txt
> Use this file to discover all available pages before exploring further.
# BigCommerce x Catalyst
Catalyst is the composable, fully customizable headless ecommerce storefront framework for [BigCommerce](https://www.bigcommerce.com/). Catalyst has been built with [Next.js](https://nextjs.org/), [React](https://react.dev/) storefront components, and BigCommerce's [GraphQL Storefront API](https://developer.bigcommerce.com/docs/storefront/graphql).
When you use Catalyst, you can create a fully functional BigCommerce storefront using their CLI and get to work without wiring up APIs or building ecommerce components from scratch that are optimized for SEO, accessibility, and performance. Catalyst is designed to take care of the essentials so you can focus your efforts on building your brand and adding those special features that take storefronts to the next level.
You can find a demo version of Catalyst at [https://catalyst-demo.site/](https://catalyst-demo.site/), hosted on Vercel in a US region.
While Makeswift is a part of BigCommerce, Catalyst and Makeswift are
completely decoupled solutions. This is to say that Catalyst and Makeswift can
be used in conjunction, or independent of one another. While they are separate
solutions, both are built to be heavily integrated with one another. This
guide serves as a supplement to the documentation available on [Catalyst's
Getting Started documentation](https://www.catalyst.dev/docs).
## Prerequisites
### 1. Node.js version 20.x
Catalyst currently supports Node.js version 20.x ([click here to download Node.js](https://nodejs.org/en/download/package-manager))
### 2. Corepack-enabled pnpm
Node.js version 20.x ships with Corepack by default; you should be able to run corepack enable from your terminal to meet this prerequisite ([more information on the official Node.js Corepack documentation](https://nodejs.org/docs/latest-v20.x/api/corepack.html))
### 3. Git version 2.35.x or later:
[Click here to download Git](https://git-scm.com/book/en/v2/Getting-Started-Installing-Git)
### 4. A BigCommerce store or sandbox
You can [create a trial store](https://bigcommerce.com/start-your-trial/) or [spin up a developer sandbox](https://start.bigcommerce.com/developer-sandbox/) to meet this prerequisite. If you already have a BigCommerce store, that will work fine too.
### 5. A Makeswift workspace.
If you have not created a Makeswift workspace, do so ahead of time [here](https://app.makeswift.com/).
### 6. Permission to create API accounts on your store
In order to allow Catalyst to authenticate with your BigCommerce store, you'll need to make sure that your user account on the subject store has been granted the `Create store-level API Accounts` permission detailed in our [documentation on High-Risk Permissions](https://support.bigcommerce.com/s/article/User-Permissions#highrisk). If you are the assigned store owner of the store, you have these permissions implicitly.
### 7. A GitHub account
You can sign up for a free GitHub account on the [official GitHub signup page](https://github.com/join).
## Steps
Run the Catalyst CLI to pull down the latest version of the Catalyst `main` branch of the Catalyst monorepo. The CLI is built to do the following:
{/* CLI does these things (bullet points) */}
1. Fork and clone the Catalyst monorepo.
2. Add a remote pointing to the upstream Catalyst repository.
3. Enable Corepack so that you can use pnpm as your package manager.
4. Install Catalyst Dependencies.
5. Set up environment variables.
This command will prompt you to name your project, as well as connect it to a BigCommerce store.
```
npm create @bigcommerce/catalyst@latest
```
Once you run the CLI, you effectively have a Catalyst Next.js application created. The remaining steps will walk you through integrating your Catalyst application with Makeswift.
The [Catalyst Monorepo documentation](https://www.catalyst.dev/docs/monorepo) is available as an option if you would like to manually walk through the steps outlined by the CLI.
{/* Add a note as to why we would recommend the monorepo approach over the CLI */}
The Makeswift Catalyst integration is a branch available in the upstream GitHub repository that can be checked out locally.
```
git fetch upstream integrations/makeswift
git checkout -b integrations/makeswift upstream/integrations/makeswift
```
Update the root `.env.local` file with your
`Site API Key` located under your Host settings in Makeswift.
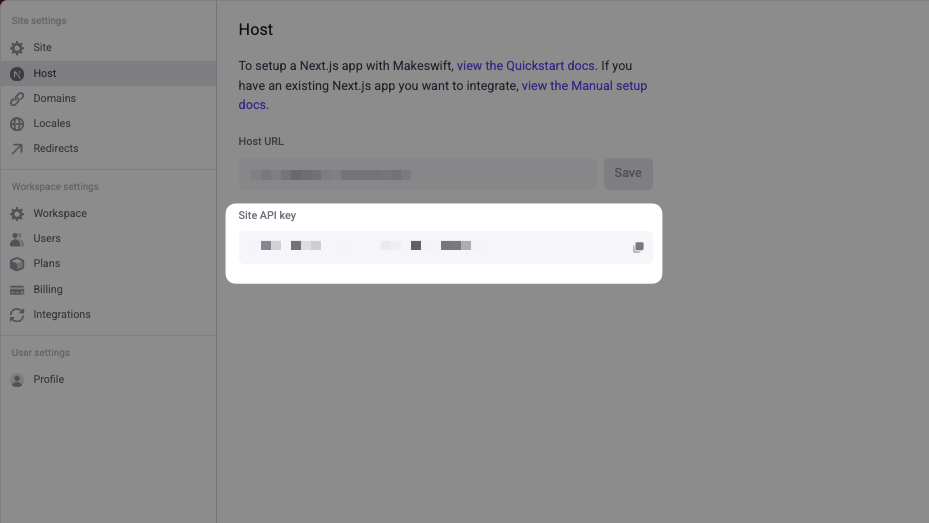
Add the key to your `.env.local` file with the following key name:
```
MAKESWIFT_SITE_API_KEY=
```
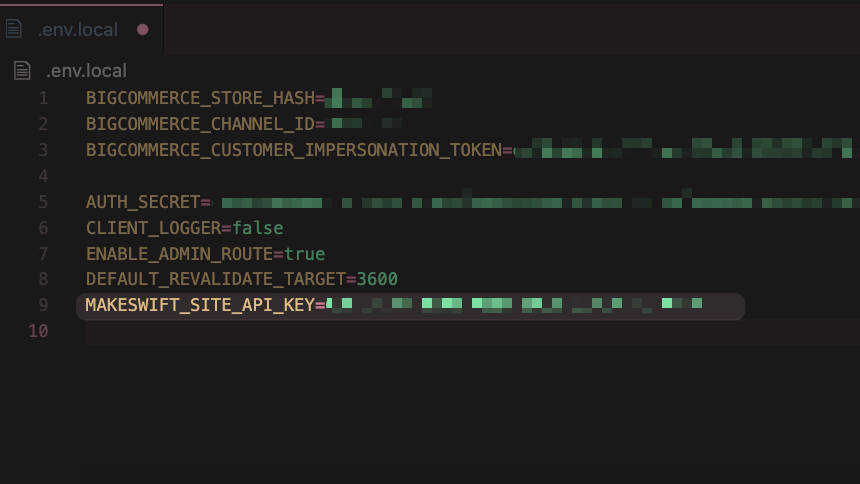
Save your `.env.local` file.
Install dependencies to match the current branch
```
pnpm i
```
Start the development server
```
pnpm dev
```
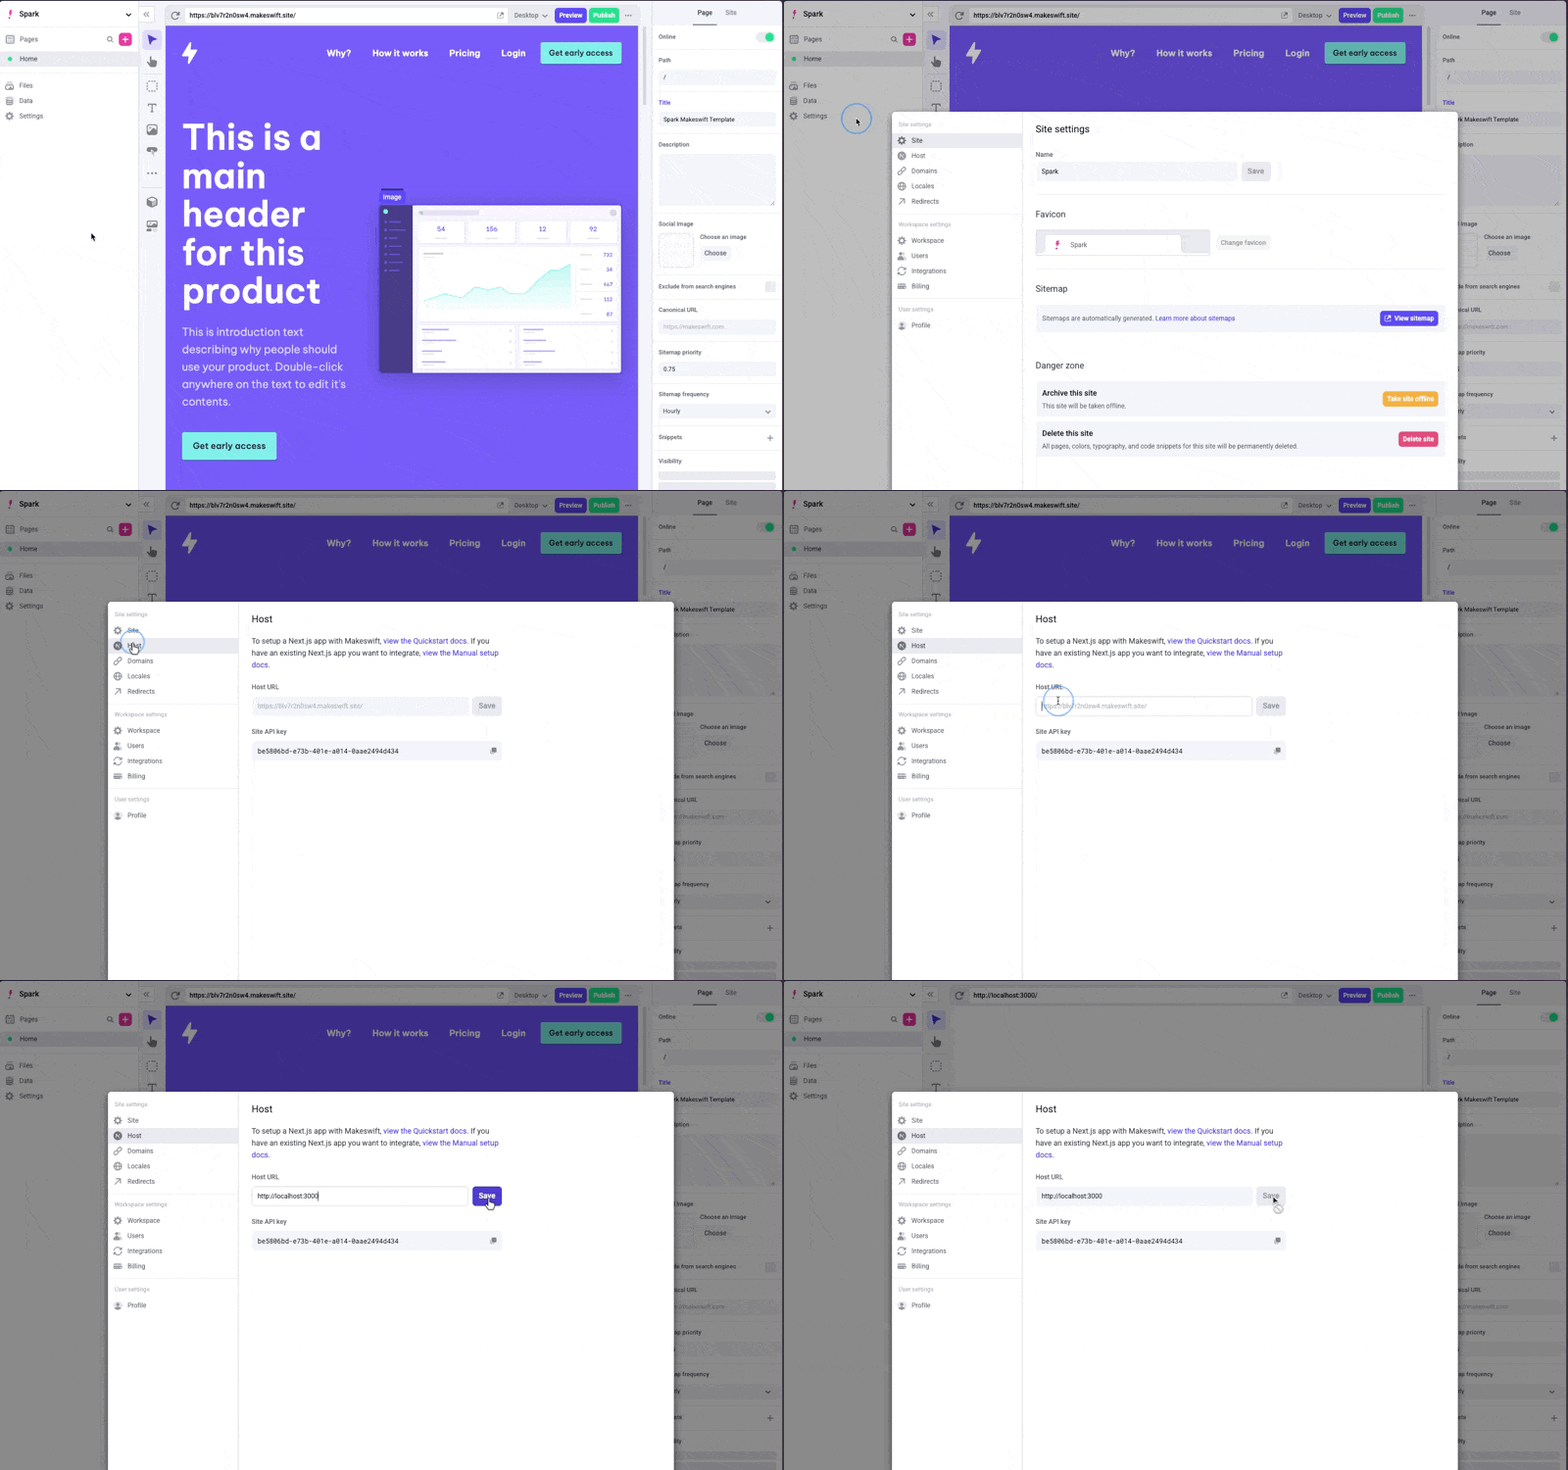
Within the Makeswift Site Settings, update the host to the URL of your locally running project. By default, it should be `http://localhost:3000`.
Create a new page within Makeswift. We recommend starting with a Blank Page.
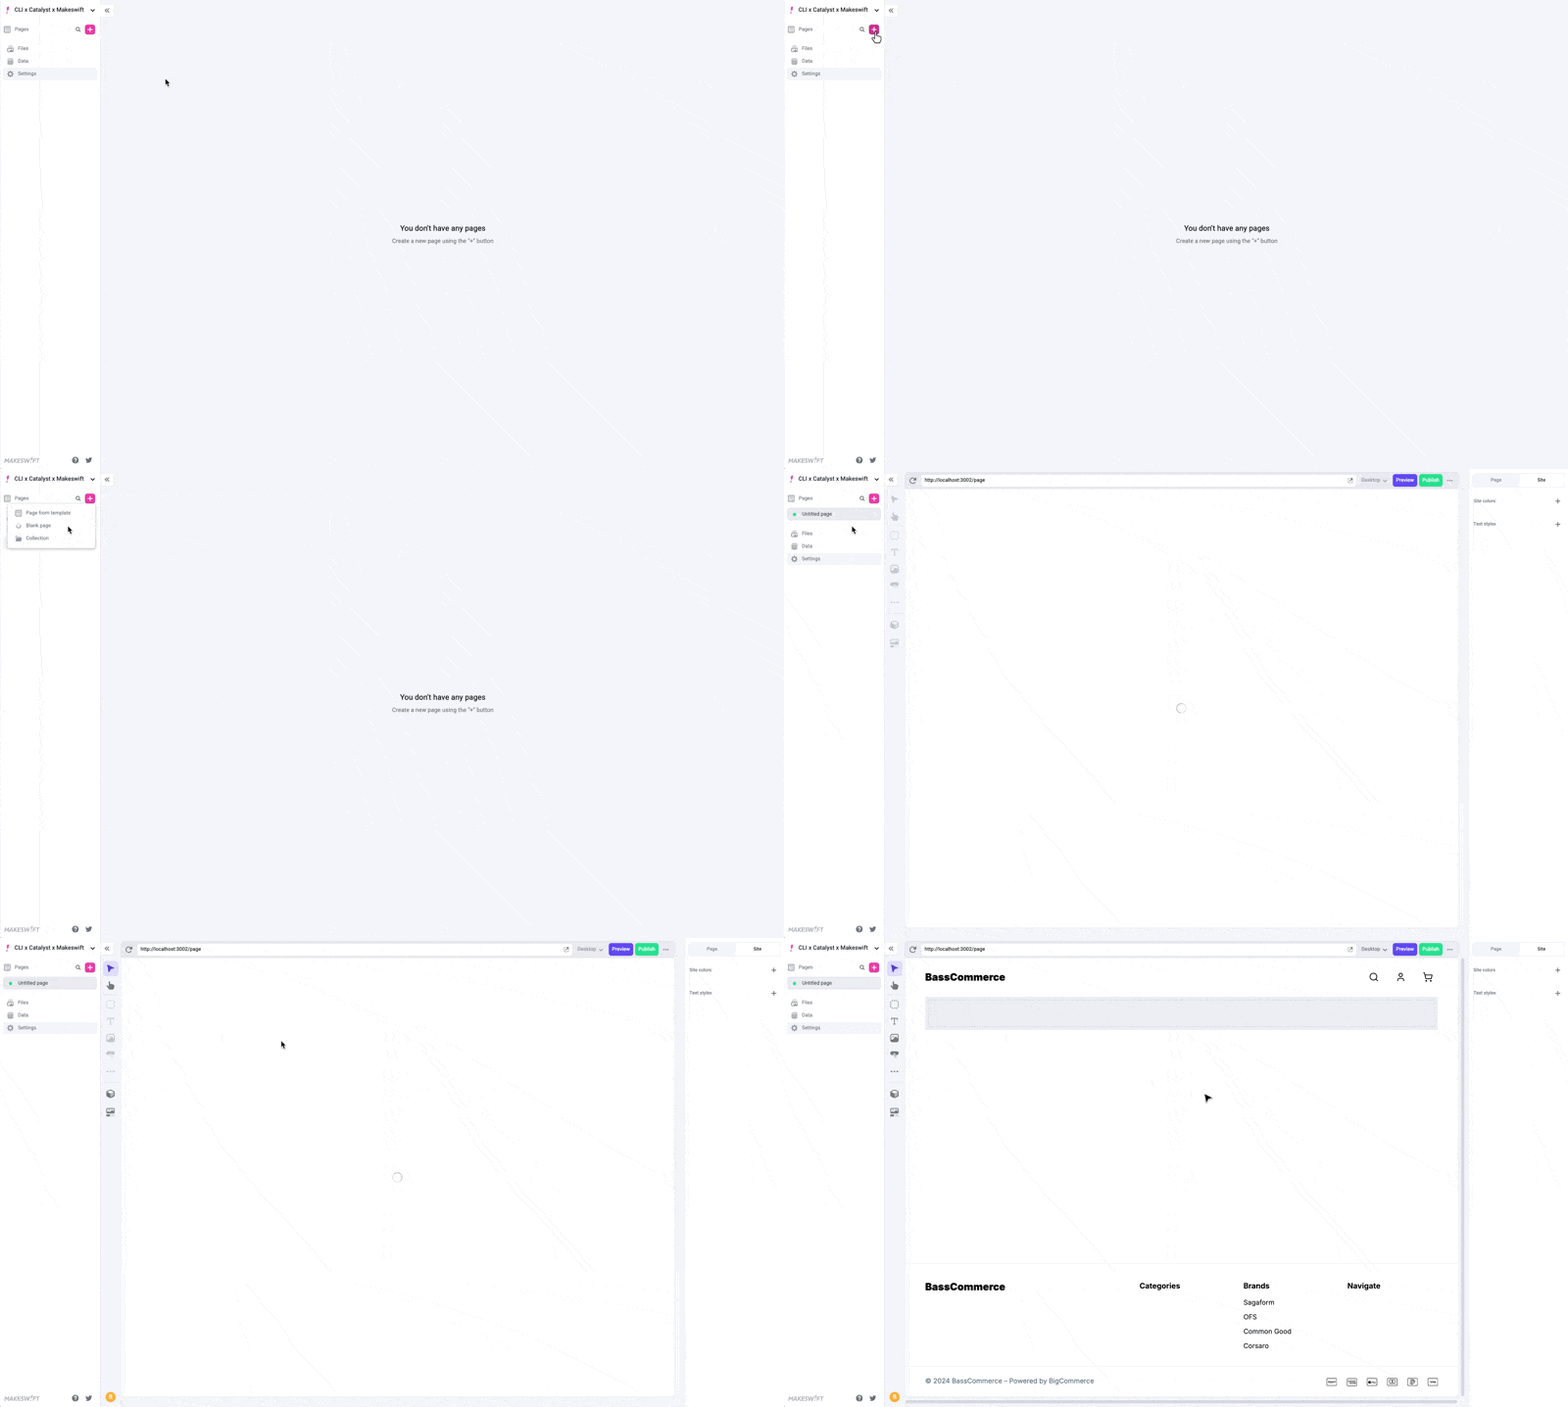
You are now able to begin custom development on your Catalyst application and visually edit your pages in Makeswift.
We recommend familiarizing yourself with Makeswift by going through the [Product Quickstart](/product/quickstart) before you begin any development. There are some out-of-the-box components that leverage the best of Next.js that can help drive some decisions around what custom components you'll want to create.
When you do identify custom components you'll need to create, checkout out our our [App Router](/developer/app-router/installation#:~:text=Register%20components%20with%20Makeswift) or [Pages Router](/developer/pages-router/installation#:~:text=Register%20components%20with%20Makeswift) developer documents to learn how to register your components with Makeswift.