> ## Documentation Index
> Fetch the complete documentation index at: https://makeswift-sasha-eng-8460-create-a-guide-for-troubleshooting.mintlify.site/llms.txt
> Use this file to discover all available pages before exploring further.
# Netlify
> Learn how to deploy your Makeswift application to Netlify.
This guide uses the Netlify dashboard to deploy your Makeswift application.
Alternatively, you can use the [Netlify
CLI](https://www.netlify.com/platform/core/cli/).
## Prerequisites
You'll need a Makeswift site. If you don't already have one, you can follow the [developer quickstart](/developer/quickstart) or [installation guide](/developer/app-router/installation) to get started. You'll also need:
* A Git repository ([full list of Netlify supported Git providers](https://docs.netlify.com/git/overview/))
* Netlify account ([sign up](https://app.netlify.com/signup))
## Create new project in Netlify
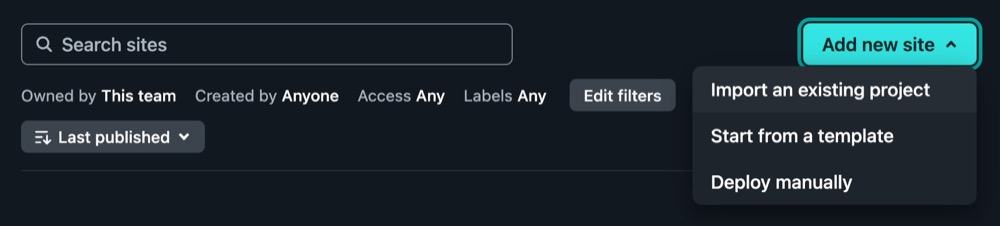
Within the Netlify dashboard, choose **Add new site... > Import an existing project** from the top right of the **Sites** page.
 ## Connect to Git repo
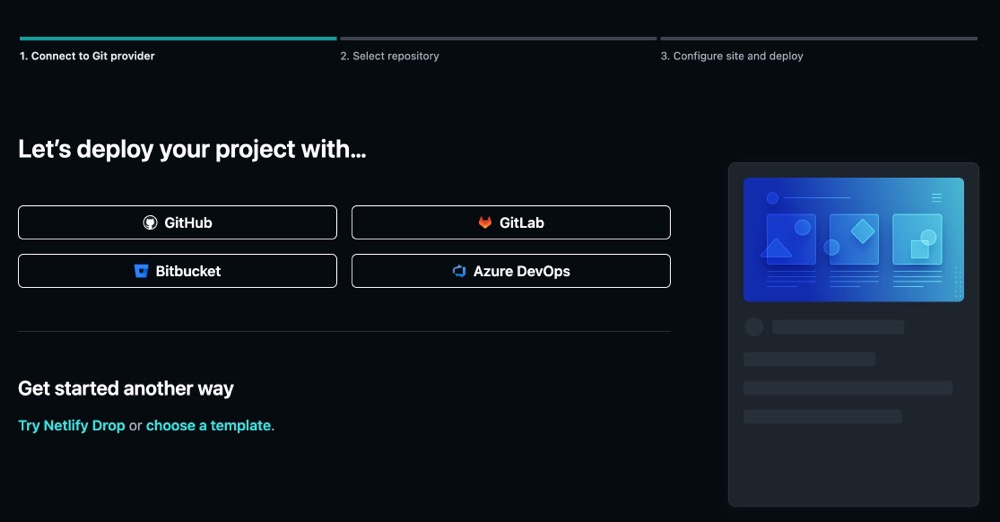
In the **Connect to Git provider** section, choose your Git repository. If you haven't already, you may need to authorize Netlify to have the correct access to your Git provider.
## Connect to Git repo
In the **Connect to Git provider** section, choose your Git repository. If you haven't already, you may need to authorize Netlify to have the correct access to your Git provider.
 ## Project settings
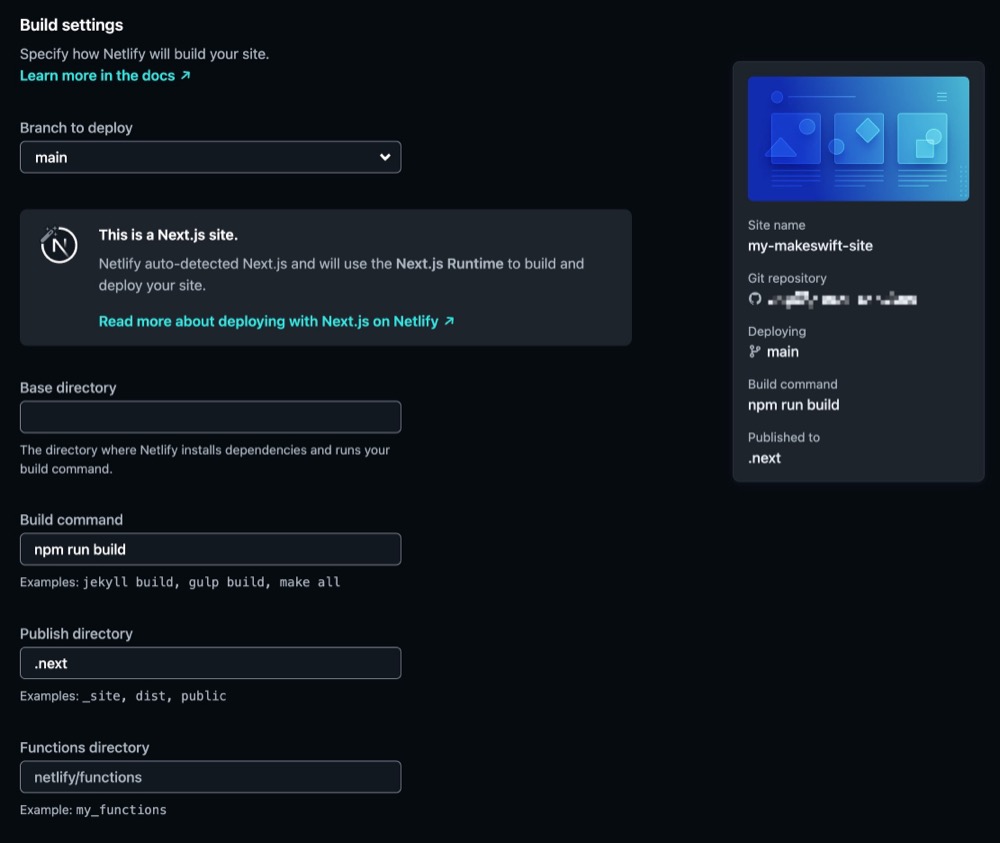
Netlify will automatically attempt to generate the correct settings for your project. Ensure these settings match your project setup.
## Project settings
Netlify will automatically attempt to generate the correct settings for your project. Ensure these settings match your project setup.
 ### Environment variables
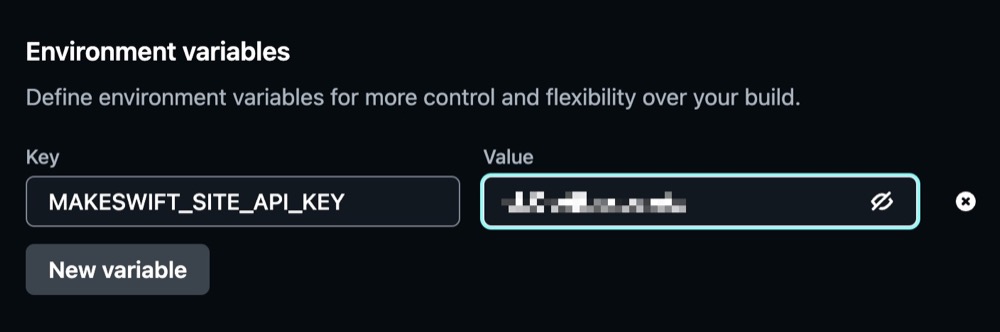
You'll need to include your Makeswift API key which you can find in the Makeswift Visual Builder under **Settings > Host**.
### Environment variables
You'll need to include your Makeswift API key which you can find in the Makeswift Visual Builder under **Settings > Host**.
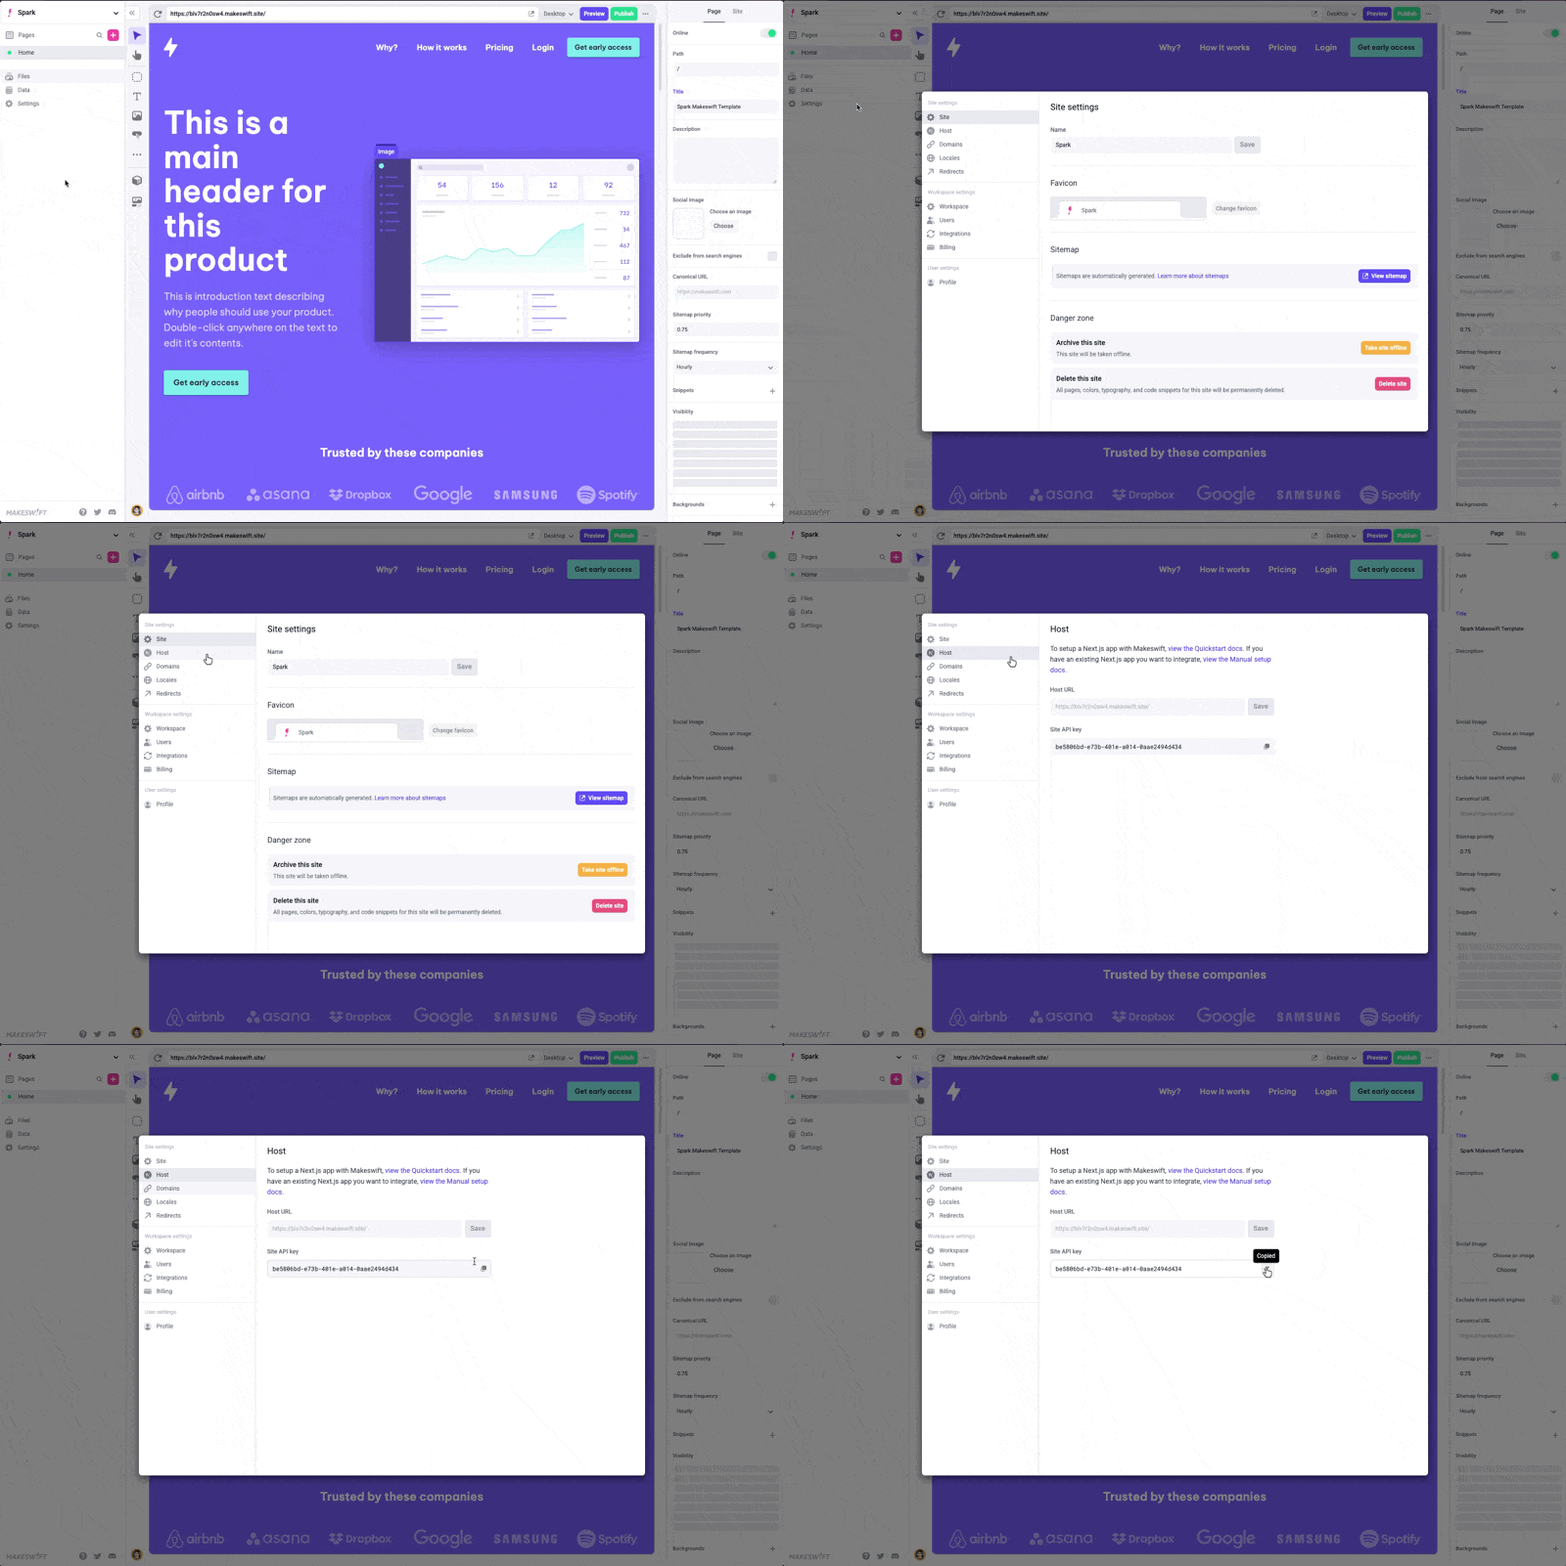 Add your API key to the **Environment Variables** section with a key of `MAKESWIFT_SITE_API_KEY`.
 ## Deploy
After you finished configuring your settings, click the **Deploy** button. Netlify will build and deploy your Makeswift application. After the build has finished, you should see a success message with a link to your deployed site.
## Deploy
After you finished configuring your settings, click the **Deploy** button. Netlify will build and deploy your Makeswift application. After the build has finished, you should see a success message with a link to your deployed site.